If you haven’t read Part 1, please do so! This post will be a continuation of the first post on aperture priority mode.
I hope everyone took their cameras off AUTO and turned the dial to A after my last post! If not, you have to try it!
I am assuming most of you are using a kit zoom lens that came with your camera. I wonder if any of you noticed your camera’s aperture value jumping around as you zoomed with your lens? If so, you have a lens with variable aperture. Another way to figure out if you have a variable aperture lens is to see if your lens has 2 numbers listed on it. For example, the lens pictured below is a variable aperture kit lens:
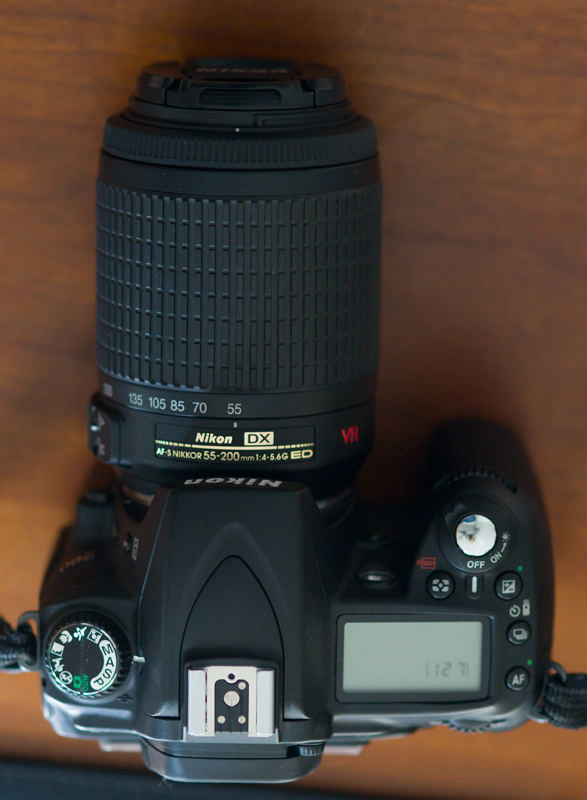
Variable aperture means that as you change focal lengths (zoom in and out), your camera’s widest aperture value changes. It is just something to be aware of in this mode with this type of lens.
Another big factor involved in changing your depth of field besides your aperture is the distance between you and your subject. As you move closer to your subject, your depth of field gets narrower (there is less in focus).
In the pictures below, I keep all the same settings on my camera and all I do is change my position relative to my subject and look what happens to that background:
For the first photo, I am about 4 feet away from my subject. Notice the background…For the second photo, I am about 2 feet away from my subject. Look at the blur of the background!


Pretty neat, right!? Ok, maybe you are not as excited by that as I am… but you should get excited! This is great stuff! 🙂
The other factor is involved in your depth of field your focal length. I used my 85mm lens to shoot the photos below:


For the first photo, I was about 4 feet away and for the second photo, I was about 2 feet away. Even though I was the same distance away from my subject as the first 2 photos, because I was shooting with a longer focal length, my background is blurrier. Also, she takes up more of the frame and there are less distractions behind her.
The settings for every single one of these photos was Aperture: f/1.8, Shutter Speed 1/250, ISO400. I did not crop these photos so the compositions are slightly different, but I wanted you to really see what I was seeing through my lens as I was shooting.
Were you able to achieve the look you were going for in Aperture Priority Mode? If not try to utilize some of the information from today to achieve a blurrier or more in focus background. It all depends on what look you are trying to achieve. If you are using a kit zoom lens, try your camera on aperture priority mode, zoom out as far as you can, dial your aperture down as far as you can and get as close to your subject as you can (you will reach a point when your camera won’t automatically focus because you are too close) and see what happens.
Do your photos look like you want them to after trying these techniques? My guess is that if you are using a kit lens, you might not be able to get as blurry of a background as you want. Most kit zoom lenses do not open up very wide (so your background is more in focus instead of blurry). The first number listed on your lens is the lowest aperture value you can achieve with your lens.
If what you really want in your photos is a super blurry background, you might consider investing in a prime lens. A prime lens does not zoom- you have to do that with your own feet (: , but they do have the ability to open up wider and make the background blurrier 🙂 My first prime lens was a Nikkor 50mm f/1.8. Nothing too expensive- maybe $100-$150? Nikkor makes a great, inexpensive 50mm and a 35mm that both open up to 1.8 and they are really worth their value. Also prime lenses tend to be sharper than zoom lenses.
Up next, we are going to talk about shutter speed!
